Configure Your Company Settings
 Converge Team
Company settings control how your workspace operates — from business hours and timezone to visitor retention, team roles, and security. This guide walks through every settings panel so you can tailor the platform to your team's workflow.
Permissions overview: Different settings require different roles. Here's what each role can access:
| Setting | Required Role |
|---|---|
| Working hours, data export | Owner |
| Visitor settings, sessions, employees | Admin+ |
| Banning visitors | Any team member |
Where to find settings: Click the Settings icon (gear) in the sidebar to access all company configuration panels.
Working Hours & Timezone
Admin / Owner OnlySetting your timezone and business hours is the foundation for time-sensitive features. Auto-reply scheduling, SLA deadline calculations, and employee shift tracking all rely on these values.
Configuring your timezone and hours
-
1
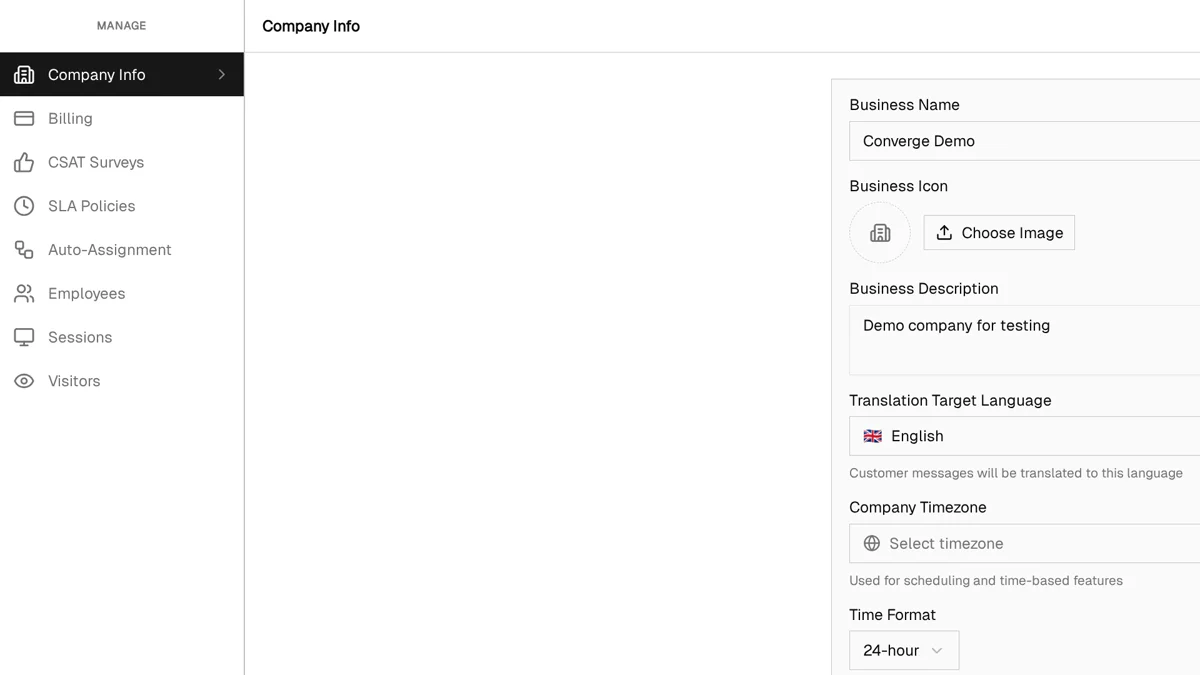
Navigate to Settings > Company Info
Open the settings panel from the sidebar and select Company Info.
-
2
Set your timezone
Use the timezone dropdown to select your company's primary timezone. This affects how all time-related features calculate deadlines and schedules.
-
3
Choose your time format
Toggle between 12-hour (AM/PM) and 24-hour format. This controls how times display across the platform.
-
4
Set business hours start and end times
Configure when your team is available. These hours determine when auto-replies send "we're online" vs "we're away" messages, and when SLA clocks tick in business-hours mode.
Visitor Retention Settings
Admin / Owner OnlyVisitor retention controls how long anonymous widget visitors are kept before automatic cleanup. This keeps your contact list relevant and your database lean.
Choosing a retention period
-
1
Navigate to Settings > Visitors
Open the Visitors settings panel from the sidebar.
-
2
Select a retention period
Choose how long inactive anonymous visitors are kept before cleanup.
| Period | Best For |
|---|---|
| 1 day | High-traffic sites with many one-time visitors |
| 7 days | Balanced — works well for most sites |
| 14 days | Gives visitors time to return before cleanup |
| 30 days | Low-traffic sites where every visitor matters |
Safe cleanup: Only anonymous L1 visitors (those who never engaged beyond browsing) are cleaned up. Engaged leads at L2 and above are never automatically deleted, regardless of the retention period.
Manual cleanup: Need to start fresh? The "Clear All Visitors" button removes all anonymous visitors immediately, independent of the retention period.
Banning Abusive Visitors
When a visitor or customer becomes abusive, you can ban them to protect your team. Any team member can issue a ban — no admin permissions required.
How to ban a visitor
There are two ways to ban someone:
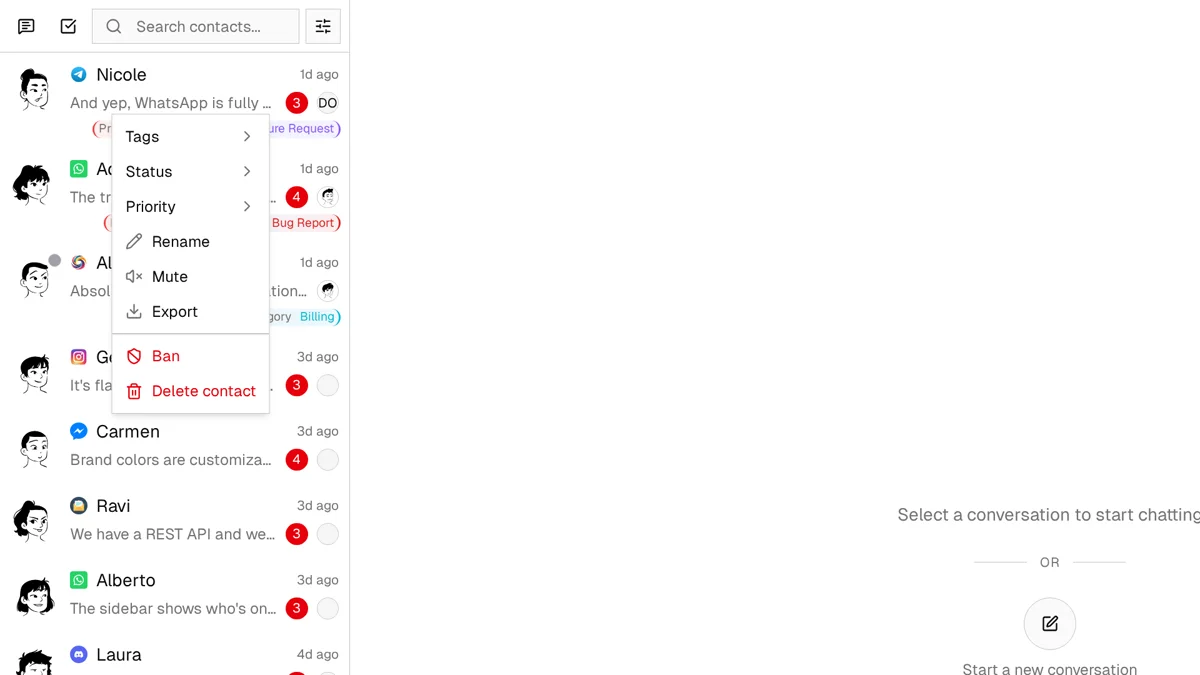
From the contact list
Right-click any contact to open the context menu, then select Ban. A confirmation dialog appears before the ban takes effect.
From the chat header
Open the conversation, then click the Ban button in the chat header bar. The same confirmation dialog will appear.
Platform-specific behavior
Widget visitors
Fully blocked. The visitor sees a "You have been blocked" message in the widget and cannot send further messages.
External platforms (Telegram, WhatsApp, etc.)
Marked as banned with a red shield badge. The customer can still send messages through the third-party platform since blocking at that level isn't possible, but your team will see the ban indicator.
Data handling on ban
- Retained: Messages and notes are kept for audit purposes
- Deleted: Analytics data, IP enrichment records, and auto-reply logs are removed
Unbanning
To unban, use the same locations — right-click the contact or use the chat header button. Unbanning removes all restrictions immediately and restores full access for widget visitors.
Rate limit: Banning is rate-limited to 10 bans per company per hour to prevent accidental mass bans.
Session Management
Admin / Owner OnlyThe Sessions panel shows all active login sessions across your team, including device information and IP addresses. Use it to audit access and revoke sessions when needed.
Viewing and revoking sessions
-
1
Navigate to Settings > Sessions
Open the Sessions panel to see all active sessions.
-
2
Review session details
Each session shows the team member's name, device type, browser, and IP address.
-
3
Revoke a session
Click the Revoke button next to any session to immediately terminate it. The user will be logged out.
When to revoke sessions
Departed employee
When a team member leaves, revoke all their active sessions to immediately cut off access.
Lost or stolen device
If a team member reports a lost laptop or phone, revoke the session tied to that device.
Suspicious activity
If you notice a session from an unfamiliar IP or location, revoke it immediately and follow up with the team member.
Exporting Your Data
Admin / Owner OnlyData export lets you download a complete archive of your company's data. Use it for backups, compliance audits, or migration purposes.
Running an export
-
1
Navigate to Settings > Company Info
Scroll down to the Data Export section at the bottom of the page.
-
2
Click Export
The system begins preparing your data archive. Processing takes a moment depending on data volume.
-
3
Download the ZIP file
Once processing completes, a download link appears. The archive contains your conversations, contacts, and configuration data.
Cooldown: Exports are limited to once per month. Plan your export schedule accordingly if you need regular backups.
Managing Your Team
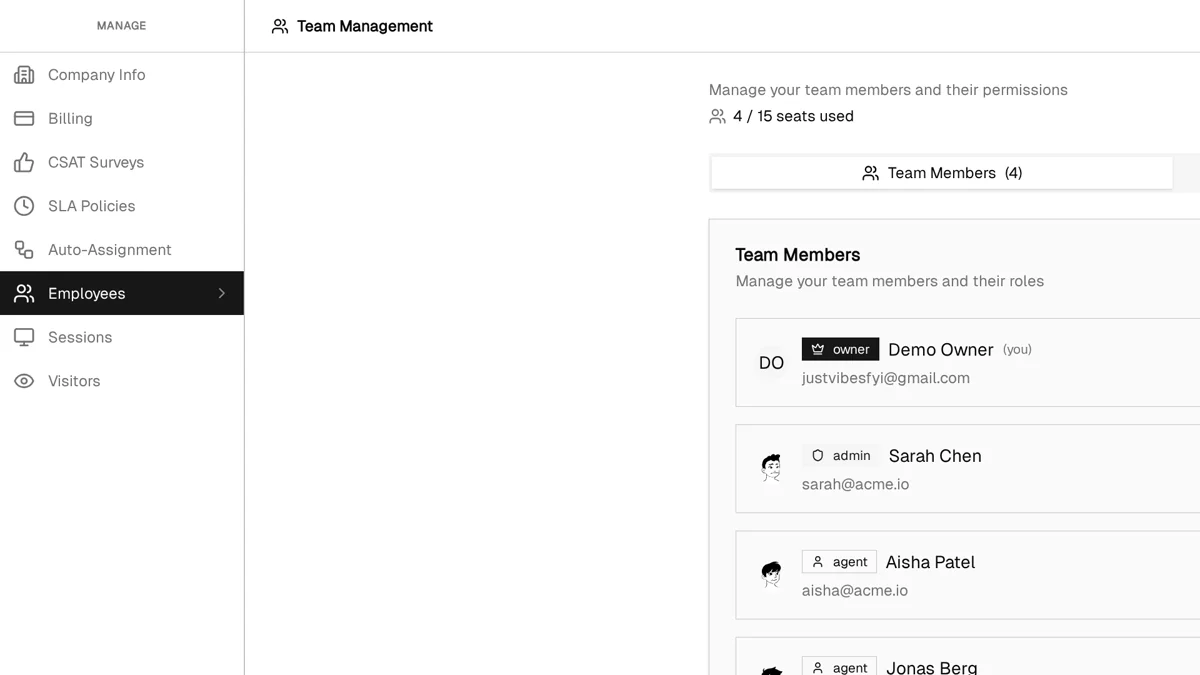
Admin / Owner OnlyThe team management page is where you invite new members, assign roles, configure shifts, and monitor seat usage. At $49/month flat rate covering up to 15 team members, you can scale your support team without per-seat surprises.
Understanding roles
Owner
Full access to everything — settings, billing, employee management, data export, and all features. There should be only one Owner per workspace.
Admin
Can manage employees, view company data, configure visitor settings, and manage sessions. Cannot access billing or data export.
Agent
Focused on day-to-day support — can chat with customers, view contact details, add notes and tags, and ban abusive visitors. No access to settings or employee management.
Inviting team members
-
1
Click the Invite button
On the team management page, click the invite button to open the invite form.
-
2
Enter the email address
Type the new member's email. They'll receive an invitation to join your workspace.
-
3
New member starts as Agent
All new invites join with the Agent role by default. You can change their role after they accept.
Managing existing members
Change roles
Use the role dropdown next to each team member to promote or demote them between Agent, Admin, and Owner.
Remove employees
Click the remove button to revoke a member's access. Their active sessions will also need to be revoked separately from the Sessions panel.
Configure employee shifts
Set individual working hours for each agent. Shifts determine when auto-routing assigns conversations to that agent and when they appear as available.
Monitor seat usage
The seat counter at the top shows how many of your 15 available seats are in use. Keep an eye on this when your team is growing.
Best Practices & Tips
Set your timezone before configuring anything else
Timezone is the foundation for business hours, SLA tracking, and auto-reply scheduling. Getting it wrong cascades into incorrect behavior across features.
Audit active sessions monthly
Review the Sessions panel regularly. Revoke sessions for devices no longer in use, former team members, or anything that looks unfamiliar.
Use short retention periods for high-traffic sites
If your site sees thousands of visitors daily, a 1-day or 7-day retention period keeps your contact list manageable without losing engaged leads.
Document ban reasons in customer notes
Before banning someone, add a note explaining why. Notes are preserved after the ban, giving your team context if the situation is revisited.
Keep the Owner role to one person
The Owner role has unrestricted access including billing and data export. Limiting it to a single person reduces the attack surface and prevents conflicting configuration changes.
What's Next?
With your company settings configured, explore these related guides:
- Inbox Guide — Master your unified conversation hub for managing all customer messages
- Platforms Guide — Connect WhatsApp, Telegram, Instagram, and other messaging channels
- SLA Guide — Define response and resolution targets with automatic breach tracking
Need more help?
Our support team is here for you. Click the chat widget in the bottom right corner to start a conversation.
We typically respond within minutes during business hours.