Assign Conversations Automatically with Auto-Routing
 Converge Team
When a new conversation arrives, someone has to pick it up. Auto-routing removes that manual step by assigning incoming conversations to agents automatically, using either a round robin rotation or a load balanced strategy. In this guide, you'll learn how to enable routing, choose the right strategy, and review assignment logs.
Who can manage routing? Changing routing settings requires Owner Only permissions. Reviewing routing logs requires Admin / Owner Only or higher. All team members can view the current routing configuration.
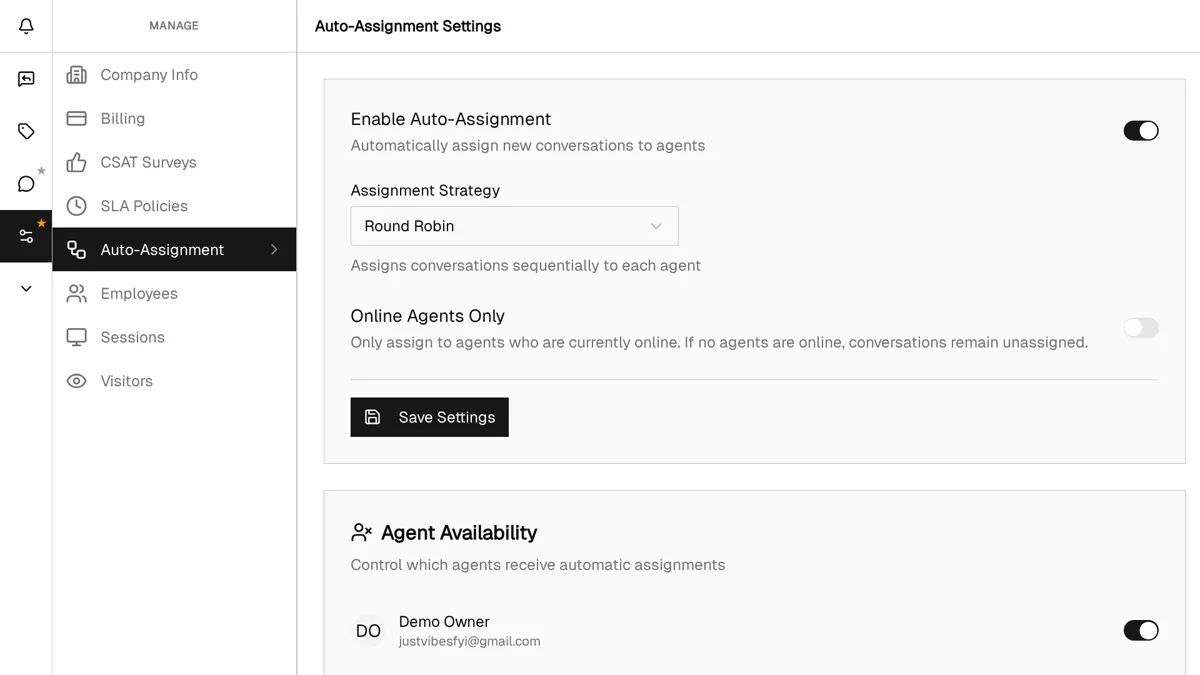
How Auto-Routing Works
Auto-routing picks an agent for each new conversation based on the strategy you select. There are two strategies to choose from, plus an optional filter that restricts assignments to online agents only.
Routing strategies
Round Robin
Rotates through all team members in sequence. Each agent gets the next conversation in turn, guaranteeing an even distribution over time regardless of how quickly individuals resolve their conversations.
Load Balanced
Assigns the conversation to the agent with the fewest open (unresolved) conversations. This keeps workloads balanced in real time, giving busier agents a break while less loaded team members pick up new work.
Online-Only Mode
When the Only Online Agents toggle is enabled, routing skips any agent who is currently offline. This is useful for teams that handle real-time chat where an immediate response is expected.
No agents online? If every agent is offline and online-only mode is active, the conversation stays unassigned until someone comes online or an agent manually picks it up.
Round Robin
Load Balanced
Enable and Configure Routing
Owner OnlySetting up auto-routing takes less than a minute. Open the routing settings, flip the toggle, and pick your strategy.
-
1
Open Routing Settings
Click the Settings icon in the sidebar, then select Routing from the settings menu.
-
2
Enable auto-routing
Flip the Enable Auto-Routing toggle to on. The strategy options will become visible below.
-
3
Pick a strategy
Choose Round Robin for sequential rotation or Load Balanced to assign based on each agent's current open conversation count.
-
4
Decide on online-only
Toggle Only Online Agents if you want routing to skip offline team members. Leave it off to include everyone.
-
5
Save
Click Save to apply your configuration. New incoming conversations will now be routed automatically.
Review Routing Logs
Admin / Owner OnlyEvery automatic assignment is recorded in the routing logs. Use them to verify that conversations are being distributed the way you expect, and to troubleshoot if something looks off.
What the logs show
Customer Name
The contact whose conversation was routed, so you can trace exactly which assignment happened.
Assigned Agent
The team member who received the conversation. Useful for spotting uneven distribution patterns.
Strategy Used
Whether the assignment used round robin or load balanced at the time of routing.
Timestamp
When the assignment happened. Helps correlate with shift schedules and peak hours.
Best Practices & Tips
Resolve conversations to keep load balancing fair
Load balanced routing counts open conversations. If agents leave resolved issues in an open state, the algorithm assigns fewer new conversations to them than it should. Resolve completed conversations promptly.
Use online-only for real-time chat support
If your team provides live chat where customers expect a reply within minutes, enable online-only mode. This prevents conversations from sitting unread in an offline agent's queue.
Check routing logs during the first week
Review the logs daily for the first few days after enabling auto-routing. Confirm that assignments match your expectations and that no agent is being skipped or overloaded.
Combine with working hours
Set your company's working hours in Settings so that routing, SLA tracking, and other time-based features align with when your team is actually available.
Start with round robin, then consider load balanced
Round robin is the simplest starting point—every agent gets a turn. As your team grows and agents handle different volumes, switch to load balanced for a more adaptive distribution.
What's Next?
Auto-routing is set up. Here are some related features to explore:
- Inbox Guide — Master conversation management, filtering, and bulk actions
- Replies Guide — Speed up responses with quick replies and auto replies
- SLA Guide — Define response and resolution targets with automatic tracking
Need more help?
Our support team is here for you. Click the chat widget in the bottom right corner to start a conversation.
We typically respond within minutes during business hours.