Organize Your Customers with Tags
As your customer base grows, keeping track of who's who becomes challenging. Tags let you categorize customers by any criteria that matters to your business—priority level, product interest, support tier, or anything else. In the next 8 minutes, you'll learn how to create tags, organize them into groups, and use them to work smarter.
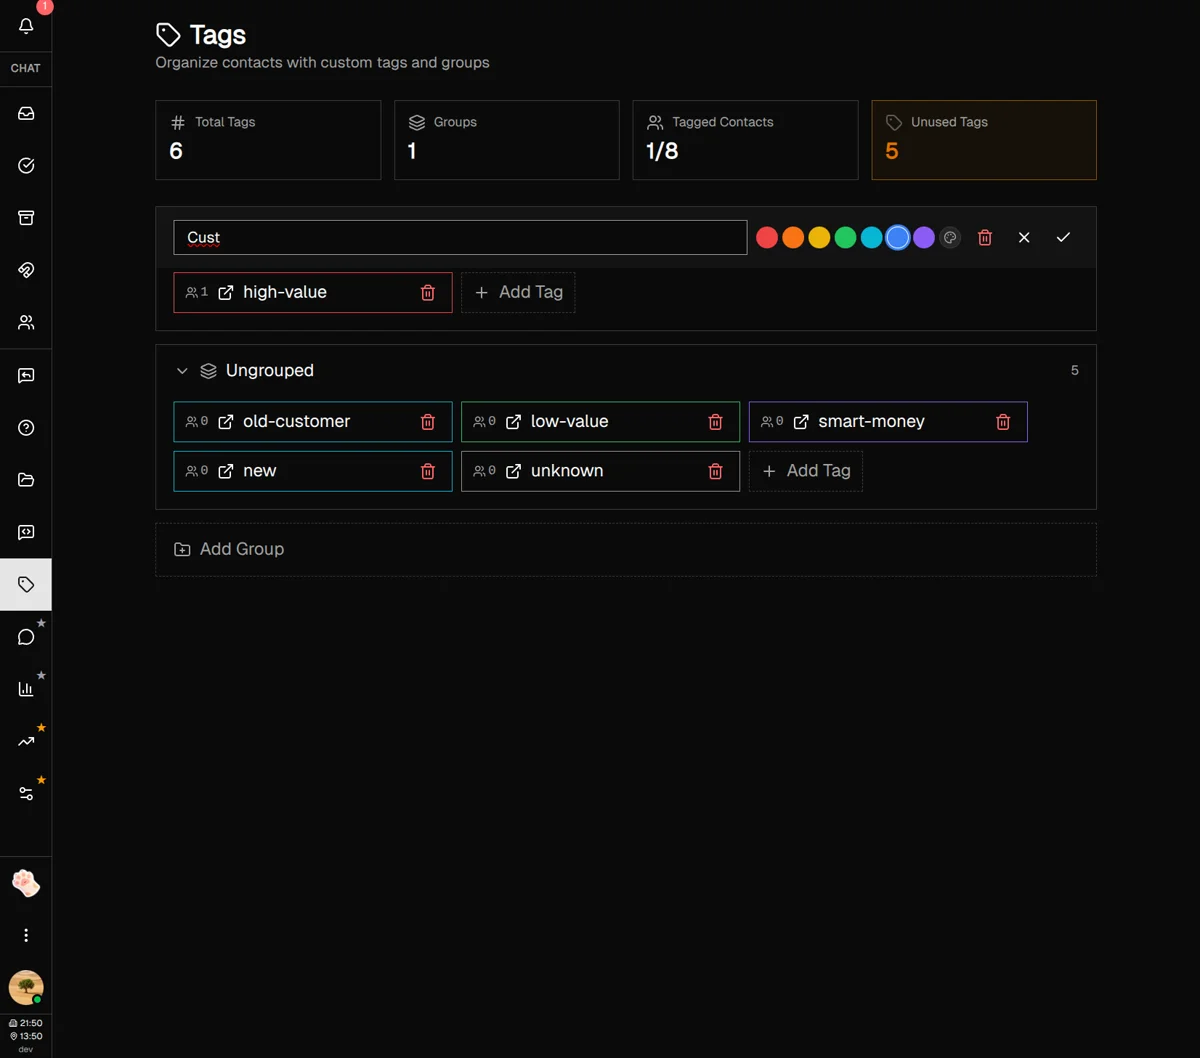
Understanding Tags
Tags are colored labels you attach to customers to categorize and identify them at a glance. Unlike notes or conversation history, tags are immediately visible in your customer list—making it easy to prioritize and filter your workload.
Tags
Individual labels with a name and color. Examples: "VIP", "Urgent", "Trial User", "Enterprise".
Tag Groups
Folders that organize related tags together. Examples: "Priority Level" (containing High, Medium, Low) or "Product Interest" (containing Feature A, Feature B).
Tag Filtering
Instantly filter your inbox to show only customers with specific tags. Great for focused work sessions or team assignments.
Who can do what? All team members can view tags and assign them to customers. Creating, editing, and deleting tags is available to all team members as well.
Organizing with Tag Groups
Once you have more than a handful of tags, groups become essential. They keep your tag list organized and make it faster to find the right tag when categorizing customers.
Creating a tag group
-
1
Click "Add Group"
At the bottom of the Tags page, click the dashed button with a folder icon.
-
2
Name your group
Choose something descriptive like "Priority Level", "Customer Type", or "Product Interest".
-
3
Optionally pick a group color
Group colors appear as a visual accent, helping you identify which group a tag belongs to.
-
4
Press Enter or click the check icon
Your group is created with its own collapsible section.
Moving tags into groups
There are two ways to add tags to a group:
Create directly in a group
Click "Add Tag" inside any group section to create a tag that's already organized.
Move an existing tag
Click a tag to edit it, then use the group dropdown to move it to a different group.
Collapsing groups
Click the arrow next to any group name to collapse or expand it. This keeps your view tidy when you have many groups. Your collapse preferences are remembered.
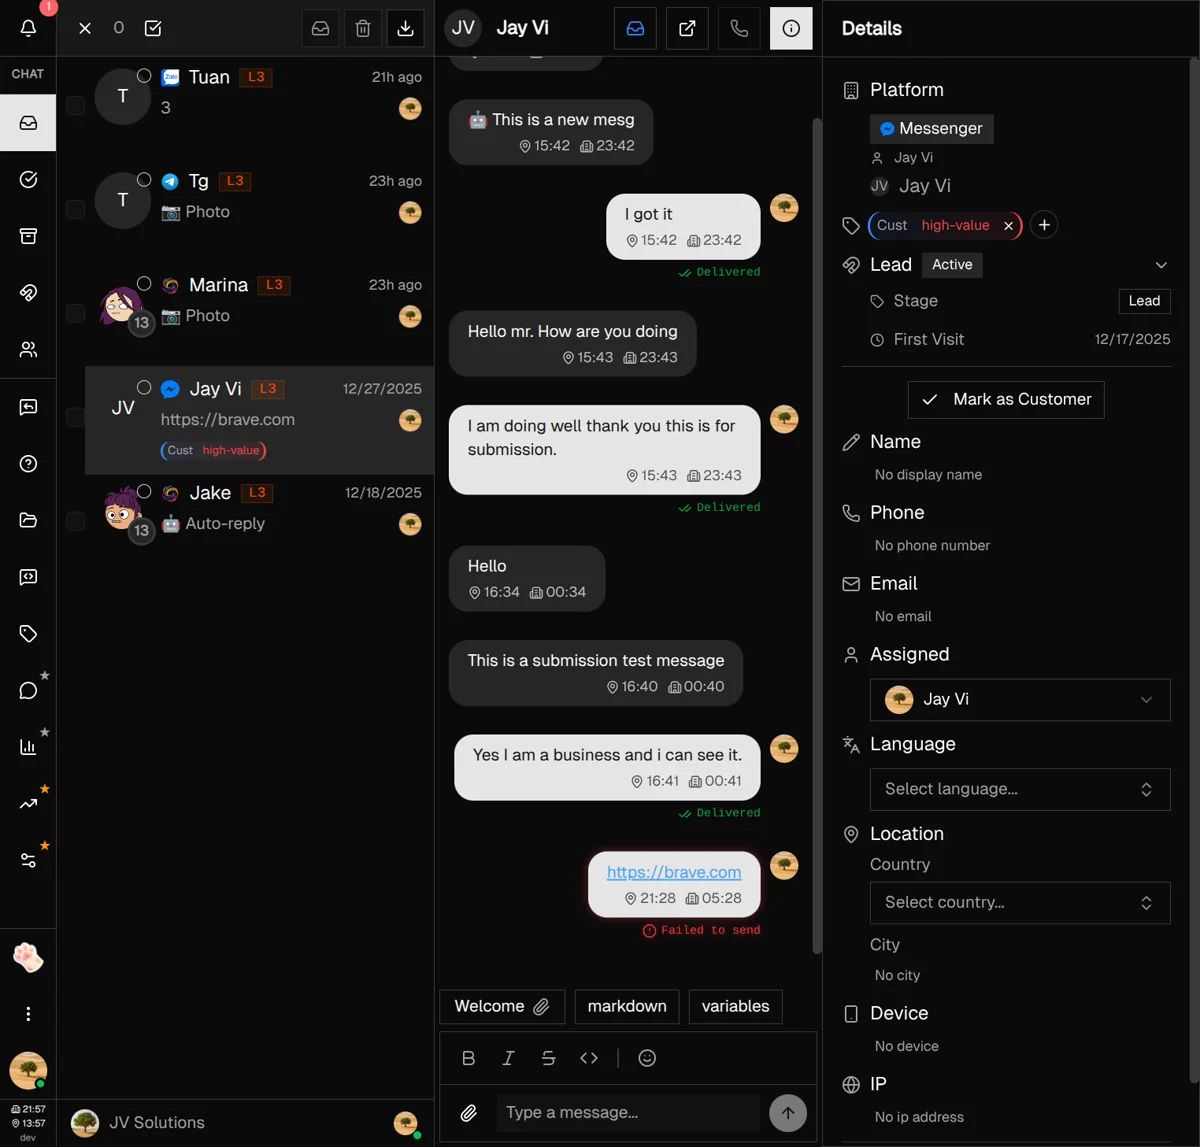
Filtering by Tags
The real power of tags comes when you need to focus on a specific group of customers. Filtering lets you see only the conversations that matter right now.
Filtering from the Tags page
-
1
Go to Tags
Open the Tags page from the sidebar.
-
2
Find the tag you want to filter by
Each tag shows a customer count next to it—this tells you how many customers have that tag.
-
3
Click the external link icon
This takes you directly to your inbox, filtered to show only customers with that tag.
Filtering from the inbox
You can also filter directly from your inbox:
-
1
Click "Filter by Tags" in the inbox toolbar
-
2
Select one or more tags
Your list updates immediately to show only matching customers.
-
3
Clear the filter when done
Click "Clear filter" to return to your full customer list.
Best Practices & Tips
Keep tag names short
"VIP" is better than "Very Important Customer". Tags appear in tight spaces throughout the interface.
Use consistent color schemes
If red means "urgent" in one tag, use red for all urgent-related tags. Your team will learn to spot patterns.
Review unused tags regularly
The Tags dashboard shows "Unused Tags" count. If a tag has zero customers, consider whether you still need it.
Create groups before tags
Plan your categorization system first. It's easier to create tags in the right group than to reorganize later.
Tag early and often
The best time to tag a customer is during your first interaction. Don't wait—tag them as soon as you identify something relevant.
What's Next?
You've set up your tagging system. Here are some related features to explore:
- Replies Guide — Create templates for quick, consistent responses
- Contact Analytics — Analyze patterns across your tagged customer segments
- Customer Notes — Add detailed notes alongside your tags for context
Need more help?
Our support team is here for you. Click the chat widget in the bottom right corner to start a conversation.
We typically respond within minutes during business hours.