Organize Your Files with Assets
Stop searching through chat history for that PDF you sent last month. Assets gives your team a central library for all company files—images, documents, attachments, and media. Upload once, use everywhere.
Understanding Your Asset Library
Think of Assets as your team's shared file cabinet—but smarter. Every file uploaded to Converge (whether through conversations or directly) lands here, automatically organized and searchable.
File Categories
Files are automatically sorted into categories: Attachments (files shared in chats), Documents (PDFs, Word files), Avatars (profile images), and general Assets.
Custom Tags
Add your own tags to files for easy filtering. Tag product images with "catalog" or support documents with "FAQ"—whatever makes sense for your workflow.
Storage Monitoring
Track your storage usage at a glance. See how much space each category uses and get warnings before you hit your limit.
Who can do what? All team members can upload, view, and download files. Storage cleanup and advanced management features require Admin or Owner access.
Uploading Files
Getting files into your asset library is straightforward. You can upload directly from the Assets page, or files will automatically appear when shared in conversations.
Direct upload
-
1
Open Assets
Click the folder icon in the sidebar to open the Assets view.
-
2
Click "Upload Files"
Find the button in the top right corner. You can select multiple files at once.
-
3
Select your files
Choose images, documents, PDFs, videos, or audio files from your computer. Supported formats include JPG, PNG, PDF, MP4, and more.
-
4
Watch them appear
Files upload in the background. You'll see a success notification, and the file appears in your library with auto-generated tags.
Automatic from conversations
When you or a customer shares a file in a conversation, it's automatically saved to your asset library. No extra steps needed—the file is categorized as an "Attachment" and linked to that conversation.
Organizing with Tags & Categories
A library is only useful if you can find what you need. Converge automatically categorizes files, and you can add custom tags to create your own organization system.
Automatic categories
| Category | What's Included |
|---|---|
| Attachments | Files shared in customer conversations |
| Documents | PDFs, Word docs, text files |
| Avatars | Profile pictures for team members and company |
| Assets | General files uploaded directly |
Adding custom tags
-
1
Click on any file to open the preview
-
2
Find the Tags section below the preview
-
3
Type a tag name and press Enter
Tags are automatically lowercased. Use short, descriptive names like "catalog", "pricing", or "how-to".
-
4
Click the X on any tag to remove it

Browsing & Searching Assets
With potentially hundreds of files in your library, you need efficient ways to find what you're looking for. Assets offers search, filters, and two view modes.
Search by name or tags
The search bar at the top searches both file names and tags. Type "invoice" to find files named "invoice.pdf" or any file tagged with "invoice".
Filter by category
Use the dropdown next to the search bar to show only specific categories—Attachments, Documents, Avatars, or Assets. Select "All Files" to see everything.
Filter by tags
All your tags appear as clickable pills above the file list. Click a tag to show only files with that tag. Click it again or use "Clear filter" to reset.
Grid vs. List view
Grid View
See file thumbnails in a visual grid. Great for browsing images and quickly identifying files by their appearance.
List View
Compact rows with file details. Shows file name, size, upload date, and tags. Better for documents and detailed scanning.
Toggle between views using the grid/list buttons in the top right corner. Your preference persists across sessions.
Managing Individual Assets
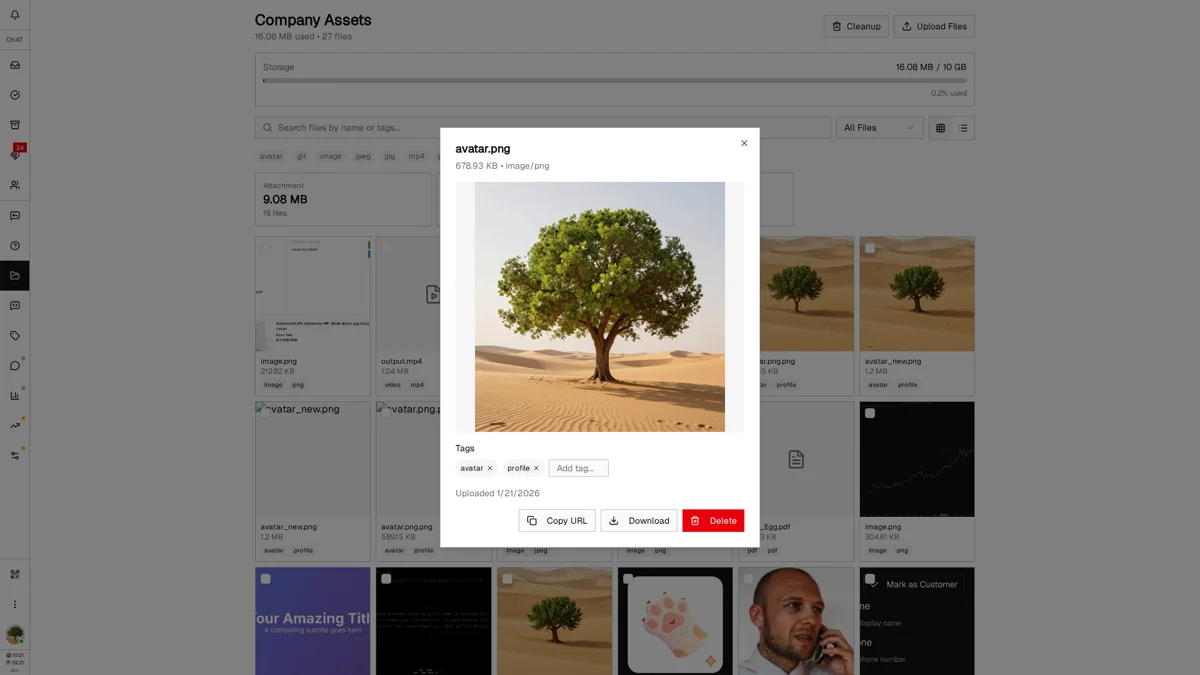
Click any file to open a detailed preview with options to copy, download, or delete. For images, videos, and audio, you'll see a full preview; for documents, you'll see file information.
Quick actions
Copies the file's direct URL to your clipboard. Use this to share links in emails or embed in documents.
Downloads the original file to your device with its original filename.
Permanently removes the file. You'll be asked to confirm before deletion.
Bulk selection
Need to manage multiple files? Use the checkboxes on each file to select them. A selection bar appears showing how many files are selected, with options to clear the selection.
Storage Management & Cleanup
Admin / Owner OnlyYour account has a storage limit. The Assets view helps you monitor usage and clean up old files when needed.
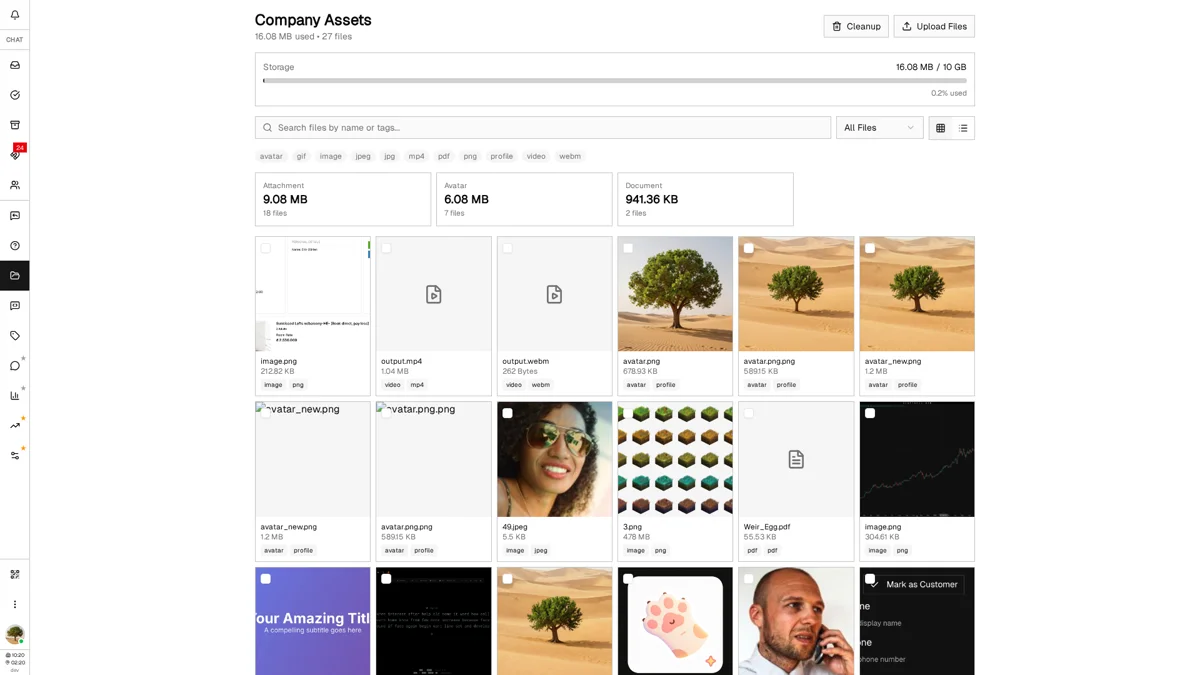
Storage overview
At the top of the Assets page, you'll see your current storage usage—total space used, number of files, and how close you are to your limit. A progress bar shows your usage percentage.
Category breakdown
Below the storage bar, cards show how much space each category uses. This helps identify where most of your storage is going—maybe conversation attachments are piling up, or you have many large documents.
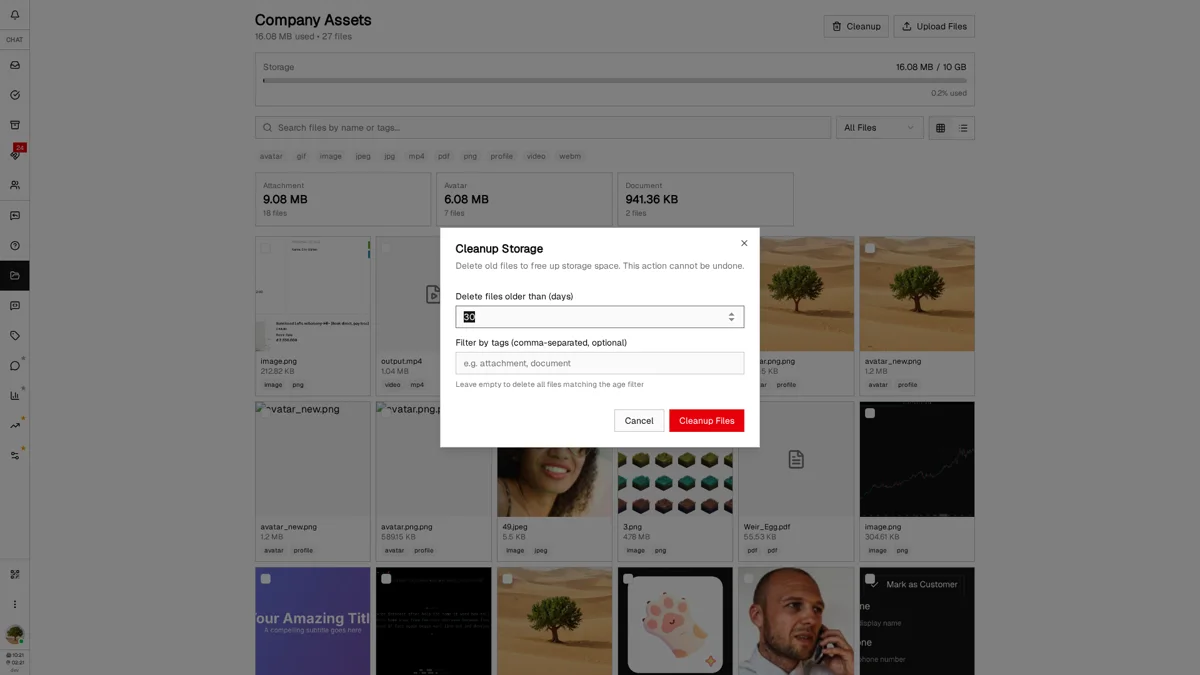
Manual cleanup
Click the "Cleanup" button to open the cleanup dialog. Here you can:
- Set age threshold — Delete files older than X days (e.g., 30, 60, 90 days)
- Filter by tags — Only delete files with specific tags (e.g., only "attachment" files)
After cleanup, you'll see a summary of how many files were deleted and how much space was freed.
Best Practices & Tips
Tag consistently from the start
Establish a tagging convention with your team early. It's much easier to tag files as you upload them than to organize hundreds of files later.
Use Assets with Quick Replies
Upload frequently-shared files (price lists, setup guides, product images) to Assets, then attach them to Quick Replies for one-click sharing.
Monitor storage proactively
Don't wait for the 80% warning. Check your storage monthly and clean up old attachments to avoid auto-deletion surprises.
Use the right view for the task
Grid view for browsing images and visual content. List view for scanning documents and checking file details quickly.
Copy URLs for external sharing
Need to share a file via email or another platform? Copy the direct URL from Assets instead of re-uploading the file.
What's Next?
Now that you have your file library organized, explore these related features:
- Replies Guide — Attach files from Assets to your quick reply templates
- Unified Inbox — See files shared in conversations automatically appear in Assets
- Tags — Use the same tags for files and customers to keep everything connected
Need more help?
Our support team is here for you. Click the chat widget in the bottom right corner to start a conversation.
We typically respond within minutes during business hours.